✔ Fact-checked. For informational purposes only.
Smart Home in 7 Days: A Complete DIY Guide to Automating Your Entire Home Without the Need of an Installer
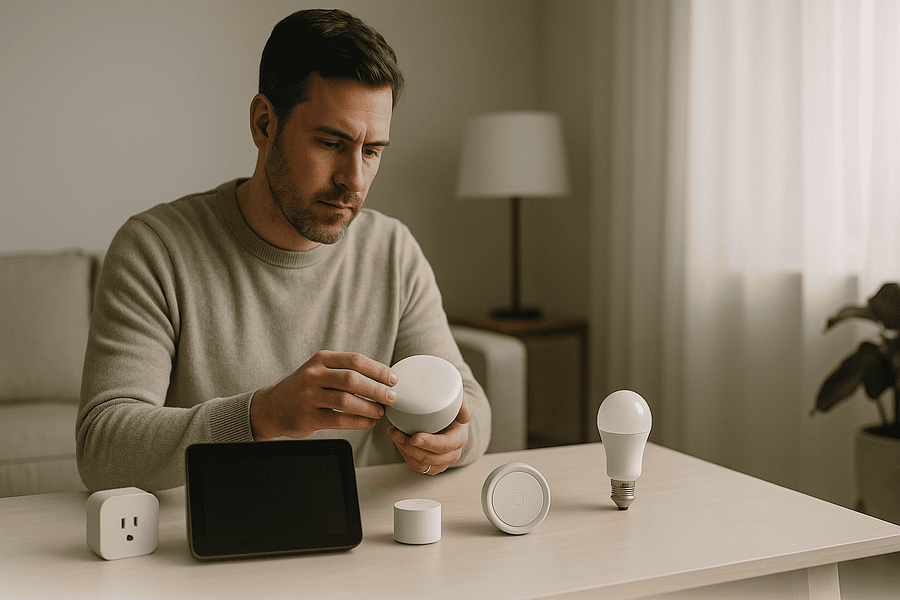
Building a connected, automated Smart Home environment can seem like a massive undertaking, often requiring expensive professional installation. However, the modern ecosystem of DIY-friendly devices and unified standards makes it entirely possible to automate your entire living space in a single, focused week. This comprehensive, 7-day plan breaks down the process into manageable, logical stages, ensuring a robust, integrated, and high-performance system without the need for an installer. By adhering to this expert protocol, you will establish the necessary foundation and then build upon it, day by day, to achieve complete home automation.
Day 1: Establishing the Foundation—The Hub and Network
The first and most critical step in building your Smart Home is establishing a stable, reliable foundation. This includes selecting your primary control platform and ensuring your home network can handle the increased traffic.
Selecting Your Ecosystem and Hub
Choose a central smart home hub (or controller) that dictates the communication standards for your entire system. Popular DIY ecosystems include platforms like Apple HomeKit, Google Home, Amazon Alexa, or open-source solutions like Home Assistant. This hub acts as the brain, allowing devices from different manufacturers to communicate and execute automation routines. Ensure your chosen hub supports protocols like Zigbee, Z-Wave, or the unifying Matter standard for maximum compatibility.
Network Validation and Optimization (Safety Note)
Every smart device relies on Wi-Fi, which can strain standard home routers. For a robust smart home, ensure you have dual-band Wi-Fi (2.4 GHz and 5 GHz) and strong signal coverage across all installation points. If your coverage is weak, install a mesh Wi-Fi system. A critical safety note: isolate your IoT (Internet of Things) devices on a separate guest network or VLAN for enhanced security, protecting your main network from potential vulnerabilities.
Day 2: Core Infrastructure—Smart Plugs and Lighting
With the hub established, the next logical step is to deploy devices that deliver the most immediate, tangible convenience: power control and lighting.
Smart Plugs for Appliances
Install smart plugs (or smart power strips) in key areas. These are simple plug-and-play devices that immediately allow you to control lamps, coffee makers, fans, and other small appliances via the hub’s app or voice commands. This deployment teaches you the basic pairing and setup process for your chosen ecosystem.
Smart Lighting Installation
Decide between smart bulbs (easier, instant color control) or smart switches (better for maintaining wall switch functionality and for controlling existing fixtures). Install them in high-use areas like the living room, kitchen, and master bedroom. This is your first opportunity to create a “Scene”—a preset state, such as “Movie Night,” which dims the lights and powers on the entertainment system.
Day 3: Security Layer 1—Entry Points and Surveillance
Security is a primary driver for smart home adoption. Focus on securing the exterior and main entry points.
- Smart Door Locks: Install a smart lock on your main entry door. This is typically a mechanical-electronic hybrid that requires basic screwdriver skills. Ensure it integrates directly with your Day 1 hub.
- Video Doorbell: Install a video doorbell. This often only requires replacing your existing doorbell transformer or utilizing battery power. This provides remote monitoring and two-way communication.
- Simple Cameras: Place a basic indoor or outdoor camera near high-value areas or main access points. Focus on reliable, local storage options or secure cloud subscriptions, depending on your data privacy comfort.
Day 4: Environmental Control—Climate and Comfort
Automating your home’s climate leads directly to energy savings and improved comfort, offering a strong return on investment.
Smart Thermostat Integration
Replace your existing thermostat with a smart thermostat. This usually requires labeling your existing wiring (safety: turn off power at the breaker first). A modern smart thermostat can learn your schedule, use presence detection, and optimize energy usage while linking to your central Smart Home hub.
Monitoring and Optimization
Install smart temperature/humidity sensors in non-thermostat areas (e.g., basement, baby’s room) to track microclimates. Use these sensor readings to trigger automation. For instance, if the basement humidity exceeds 60%, a smart plug turns on a dehumidifier.
Day 5: Expanding Automation—Sensors and Routines
This is where the ‘intelligence’ of your Smart Home truly emerges. Day 5 is dedicated to deploying specialized sensors and creating complex automation routines (often called “If This, Then That” or IFTTT rules).
- Motion and Contact Sensors: Place motion sensors in hallways and contact sensors on windows and interior doors. These small, battery-powered devices are the eyes and ears of your system.
- Critical Routines: Develop key automation flows:
- “Good Morning” Routine: Alarm triggers lights to turn on slowly, thermostat adjusts, and the news plays on a smart speaker.
- “Leaving Home” Routine: Lock the doors, arm the security cameras, turn off all smart plugs, and set the thermostat to an energy-saving mode.
Day 6: Advanced Integration—Media and Voice
Integrate your entertainment and communication systems to unify the experience.
Voice Assistant Synergy
Ensure all your devices are correctly linked to your preferred voice assistant (e.g., Google Assistant or Alexa). Practice using voice commands to trigger the routines you built on Day 5, ensuring they work seamlessly across multiple rooms.
Media and Entertainment Automation
Integrate smart media devices. Use a universal remote hub (often IR/RF based) to control non-smart devices like TVs and soundbars. Create a “Movie Time” automation that dims the smart lights, closes smart blinds, and powers on the TV and stereo with a single voice command.
Day 7: Final Audit, Review, and Optimization
The final day is dedicated to rigorous testing, documentation, and refinement of your DIY Smart Home system.
1. Test Every Routine: Walk through every automated routine (“Good Night,” “Leaving Home,” “Movie Night”) to confirm reliability. Note any delays or failed actions and troubleshoot the triggering mechanism (sensor sensitivity, Wi-Fi reliability).
2. Documentation: Create a simple document or spreadsheet listing all devices, their login details, the type of battery (if applicable), and their location. This prevents future maintenance headaches.
3. Long-Term Planning: Identify two new areas for future expansion, such as smart irrigation or garage door control, to maintain momentum and continued efficiency improvements.
FAQ Section
Do I need an Internet connection for my Smart Home to work?
While many basic automations (like motion-triggered lights) can work locally on your home network without active Internet access, a connection is required for initial setup, software updates, voice assistant integration (cloud-dependent), and remote control functionality when you are away from home.
What is the most common DIY mistake when setting up a Smart Home?
The most common mistake is failing to choose a primary hub or ecosystem first. Deploying devices from various manufacturers that do not natively communicate leads to a fragmented system requiring multiple apps and complex, unreliable workarounds. Standardizing on a hub (Day 1) prevents this.
Is a DIY Smart Home secure?
DIY systems can be highly secure, provided you take necessary precautions. These include using unique, complex passwords for every device, enabling two-factor authentication (2FA) on your hub accounts, keeping device firmware updated, and isolating IoT devices on a separate Wi-Fi network.
How much will this 7-day Smart Home plan cost?
The cost varies significantly based on device quality and the size of your home. A basic, high-quality, whole-home setup can range from $800 to $2,500, but the modular, DIY approach allows you to spread the cost over time, adding devices as your budget allows.
Conclusion: The Empowered Automation
By diligently following this 7-day protocol, you have successfully transformed your residence into a modern, responsive, and secure Smart Home without incurring the cost or complexity of professional installation. This system is a flexible platform, ready for future expansion and tailored precisely to your specific needs and routines, delivering convenience and efficiency that enhances every aspect of your daily life.
📚 DIY Automation Standards & Safety
-
Connectivity Standards Alliance (CSA):
Matter Standard Overview
(The technology that allows you to mix brands like Apple, Google, and Eve without professional programming) -
Consumer Reports:
DIY Smart Home & Security Guide
(Independent testing data confirming that modern DIY systems rival professional installations in reliability) -
U.S. Department of Energy:
Energy Savings through Automation
(Official data on how a fully automated home reduces utility bills, offsetting the cost of the devices)
Disclaimer
This information is for educational and informational purposes only and does not constitute professional advice. Always consult with a qualified professional before making any decisions based on this content.
About the Expert
Alex Chen
Lead Technology Analyst & Smart Living Editor at FactaHub
Alex Chen leads the editorial direction and technical analysis for FactaHub’s Tech & Smart Living category. He is responsible for critically assessing new technologies and trends, ensuring that all published guides provide clear, unbiased, and actionable advice to readers seeking to integrate smart technology into their daily lives. Alex has nearly a decade of experience analyzing consumer electronics and developing user-centric solutions. Alex oversees a strict editorial process to maintain the credibility of FactaHub’s tech content, focusing on user safety, practicality, and longevity of tech products.
—